Analog mobile phones were popular in the 90’s and the last operators stopped their service only in 2007. Is it possible to launch this phone now? Let’s find out.

The Advanced Mobile Phone System (AMPS) standard was established by Bell Labs in 1983, and these phones became popular in the 1990s. This standard was something of a first-generation cellular technology – the voice was transmitted in the “old way” of frequency modulation (FM), as in walkie-talkie radio, but the radio spectrum was divided into separate channels and the so-called “control channel” is digital.
AMPS uses 825-845 MHz and 870-890 MHz bands, the spectrum is divided into 21 control channels and 395 traffic channels. Each client is assigned a separate channel for a single cell phone call. Some modern features were also available, such as roaming, and the process of dialing a telephone number was easy and not too different from modern telephones in the 21st century. The biggest drawback of AMPS was the analog voice transmission – any phone call could be tapped with a radio capable of tune to these frequencies, and as we know today, some journalists actually did this, trying to sniff out others. people’s secrets. On the other hand, in the 1980s, microcontrollers simply did not have enough computing power to use the secure digital channels we have today. In this way, the digital data stream is only used to establish a connection, but the voice is transmitted in an analog way, as with any other portable FM radio. By the way, even a few years ago, radio scanners made for the US market (such as Icom) had some “blocked” frequencies in the 800-900 MHz band. Of course, experts could unlock it back, but this at least complicates the task for non-specialists and makes it impossible to accidentally set up someone’s phone call.
Nowadays, not all AMPS operators obviously work, but thanks to open source and SDR technology, it is possible to manage an AMPS LAN, at least in a short range. It can be interesting not only for self-education, but also for demonstration purposes, such as a demonstration in a museum or a temporary exhibition – it’s always much more exciting when you can see things in working order than just putting them on the shelf. This is, by the way, the reason why so many museum exhibits are boring, this will always happen when things inside are not “alive” and cannot be demonstrated in real use.
Before we begin, important note: Before making any transmission, please check the local radio regulations. This article describes only the technical side, not the legal side. As a rule of common sense, nothing bad will happen when transmitting using a 50 ohm dummy load instead of an antenna, it will allow signals to be sent and received in a short range of a few meters – the telephone receiver is sensitive enough to receive a weak parasitic signal even from a fictitious load. Higher power transmission or amplifier may require an appropriate license.
Let’s start.
This is generally the easy part – searching on eBay using keywords like “AMPS brick phone” can get a lot of results, and prices start at $ 20. Delivery and tax can often be more expensive than the phone itself. The most common problem with older phones is the battery – after many years of inactivity, the battery cells can be completely dead. I would also test the possibility of calls between two phones, so I order two AMPS phones – Motorola StarTAC and Motorola TeleTAC. I chose these because the latter was cheap, and StarTAC, the protagonist of this article, just looks great. And it’s unfortunate to say, but some eBay sellers cheat. I bought this phone from eBay (seller’s name is hidden for privacy reasons):
In the description, the seller wrote “condition – tested”. What can go wrong? The thing is that the charger was missing, which makes the phone completely useless, at least for testing AMPS. Maybe some people buy these phones just to put them on the shelf or for retro shooting / video purposes and don’t need a charger? Anyway, the charger was not in the description and not in the photos, so I don’t think I could legally state it formally the seller did not lie. Maybe I could get my money back through Paypal’s customer protection service, but that takes time and I’ll probably have to get my phone back, which also takes time. Finally, I just ordered a second phone with a charger from another seller, so I have a spare. Just be careful and don’t hesitate to ask before making a deal.
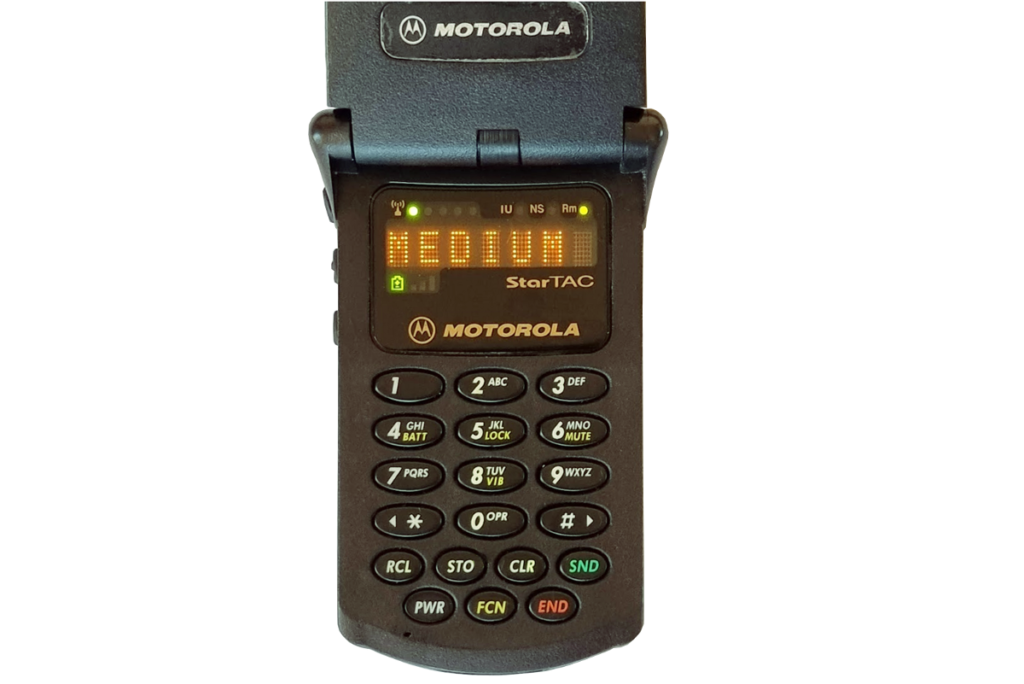
Anyway, we finally have to have a phone, and if we turn it on, the “NS” LED (no service) will flash:
The phone can’t find the network, which isn’t really surprising, considering that the last AMPS signal was turned off in 2007.
Let’s fix it.
To start our micro-network, we need several components:
- Software defined radio transmitter. The transmitter must be able to send and receive broadband signals in full duplex mode (transmission and reception simultaneously). USRP or LimeSDR will be fine for this job.
- Computer with Linux. I used a Raspberry Pi 4, so I don’t need to install Linux on my main computer. When using a Raspberry Pi, good power is essential, as the transmitter will be powered via the USB port from the same power source.
- Software that controls the transmitter. There are two possible solutions for AMPS: osmokom-analogues and gr-amplifiers.
Software installation
As already mentioned, the software is designed for Linux. In theory, it can be compiled in Windows, but many libraries are missing. In Linux, everything will work “out of the box”. Those who are not interested can skip this part, for others I will describe the full installation process.
First, we need to update the system and install SoapySDR a library that is required to access the hardware. Version 0.8 of SoapySDR is now available, but osmocom-analog is made for version 0.7 (at least at the time of writing), so we will use this:
sudo apt-get update
sudo apt-get install build-essential autoconf gcc make cmake libasound2-dev pkg-config
wget https://github.com/pothosware/SoapySDR/archive/refs/tags/soapy-sdr-0.7.2.tar.gz
tar -xf soapy-sdr-0.7.2.tar.gz
cd SoapySDR-soapy-sdr-0.7.2 && mkdir build && cd build
cmake ..
make -j4 && sudo make install && sudo ldconfig
cd ../..
Then we need to install the USRP library (only if a USRP transceiver is used):
sudo apt-get install libuhd-dev uhd-host
wget https://github.com/pothosware/SoapyUHD/archive/refs/tags/soapy-uhd-0.4.1.tar.gz
tar -xf soapy-uhd-0.4.1.tar.gz
cd SoapyUHD-soapy-uhd-0.4.1
mkdir build && cd build
cmake ..
make -j4 && sudo make install && sudo ldconfig
cd ../..
Installing the LimeSuite library (only if you use LimeSDR):
wget https://github.com/myriadrf/LimeSuite/archive/refs/tags/v20.10.0.tar.gz
tar -xf v20.10.0.tar.gz
cd LimeSuite-20.10.0
mkdir build && cd build
cmake ..
make -j4 && sudo make install && sudo ldconfig
cd ../..
Finally, we can download and install the osmocom analog software:
git clone git://git.osmocom.org/osmocom-analog
cd osmocom-analog
autoreconf -if
./configure
make -j4
sudo make install
cd ..
Testing
When the software is ready, we can connect the transmitter to the Raspberry Pi and enter the command:
sudo amps --sdr-soapy --channel 334 --channel 332 --samplerate 256000
Here we open two channels, control channel 334 and voice channel 332 – the total number of channels must be equal to the number of phones plus one. If desired, we can adjust tx-power and rx-sensitivity if necessary.
If everything is done correctly, the software will start and good ASCII graphics will appear in the Raspberry Pi console:
At the same time, the phone will receive the data from the control channel and the status of the LED will be changed to “online”:
We can see the included “Rm” (roaming) LED, because our “fake” operator ID does not match the ID that was pre-programmed in the phone. It’s not a problem and we don’t have to pay extra for roaming anyway;) It is now possible to make and receive calls from the computer to the phone and back:
Extended call details are also shown in the log:
And of course, the phone starts ringing and you can answer:
It is also interesting to see AMPS signals in the radio spectrum during a phone call. Here we can see a digital control channel and a voice channel nearby:
As we can see, it is really possible to tune in to the channel and listen to the voice that sends to the phone (the second uplink channel located on a different frequency).
It was fun to test how the 1G cellular network works. Some things were actually surprising to me:
- The system itself works well despite the fact that it was developed in 1983. The process of dialing or answering the call is really not very different from modern phones.
- The sound quality is surprisingly good. Now I understand why people complained when they switched from AMPS to the first generation GSM – FM with 12 KHz modulation actually works well.
- The confidentiality of telephone conversations can be a big problem in such a system, especially for politicians or celebrities. Or even not just for celebrities, for example, if a curious and retired neighbor has too much free time. In AMPS, anyone can listen to a call because it is transmitted in standard FM modulation. On the other hand, the simplicity of the protocol has its advantages – the coverage area is large and does not require high density of base stations, it can be important in rural areas. That was one of the reasons AMPS stayed so long in the United States, where distances in rural areas can be long.
Anyway, AMPS is already gone in history, but as we can see, it can be tested for educational or demo purposes and that’s really nice. Many thanks to the staff of osmocom-analog who made the project and made it possible.
Thanks for reading. Those interested in testing “abandoned” standards are welcome to read another article on testing POCSAG paging protocol and for two-way paging.