One of the things about being closed here in London is that I had time to work on various projects that came second. So in the last three months or so, I’ve created a much improved microphone system and camera for podcasting and streaming, I’ve built a new time delay facility, I’ve practiced my wildlife photography on local suburban creatures, and built and created a software-defined radio system for tracking passing aircraft.
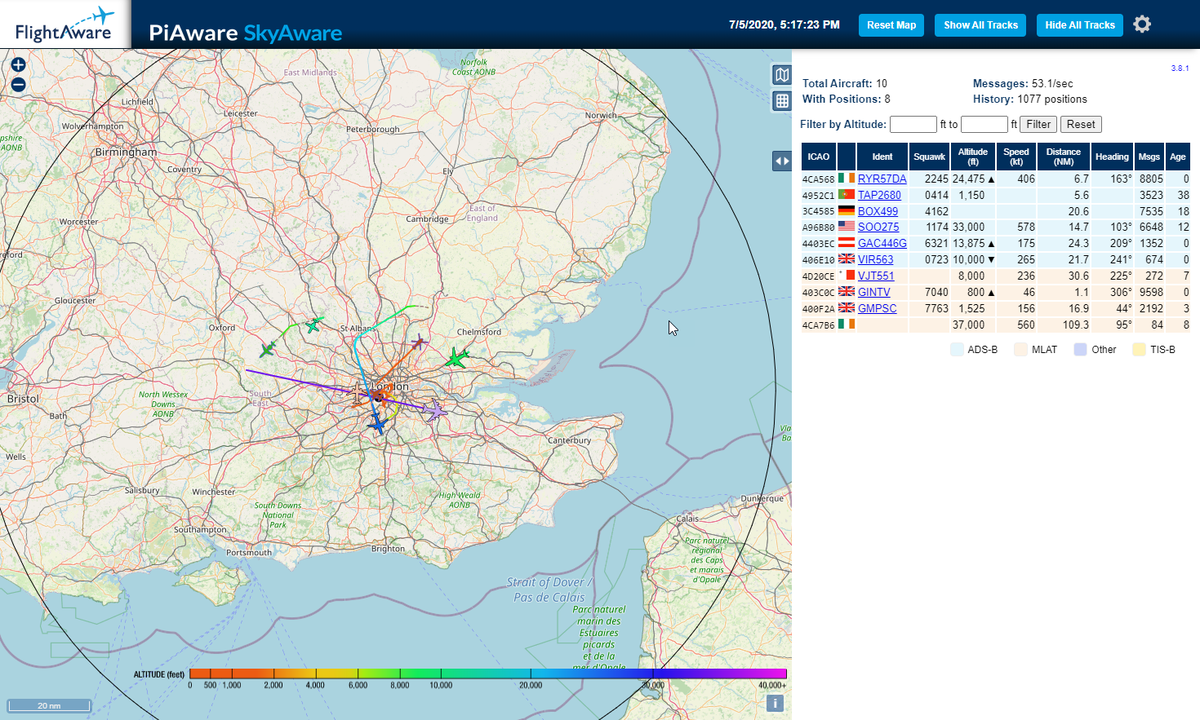
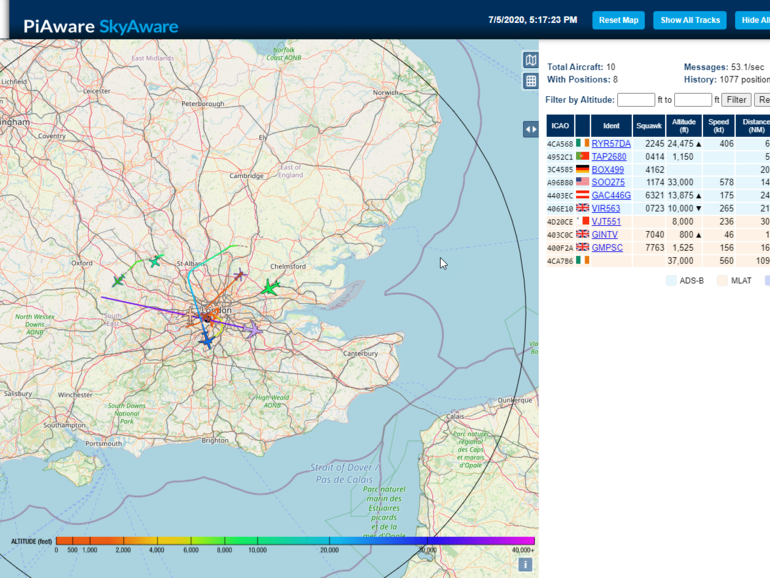
Plane over London in the July afternoon, as tracked by my ADS-B receiver
Simon Bison
The latter is perhaps more interesting for ZDNet readers, as it is the way you can start submitting aircraft location data to a growing network of tracking stations, GPS locations that most aircraft transmit to build a global map of air traffic. This approach, ADS-B, aims to make it easier for aircraft to locate each other and for air traffic control to monitor them. The fact that the data is available to anyone who collects and uses it is just a side effect.
LOOK: Rental kit: Python developer (TechRepublic Premium)
Receiving ADS-B signals is easy enough: they are broadcast at a certain frequency, 1090MHz, and must deliver data in a given format. If you have the right receiver, this binary data can be quickly translated into coordinates that can be plotted on a map using call signs to search for the type and owner of the aircraft. You’ve probably seen services like Flightradar24 and Flightaware in the news, offering ADS-B information to anyone who has a web browser.
These services receive their data from a network of volunteers with their own ADS-B receivers. Typically based around open source software, their base stations are easy enough to build and deploy, using software-defined radios to receive ADS-B signals. Most are based on a popular chipset, which was originally developed to add USB digital TV receivers to personal computers, with a set of APIs that make it easier to adapt for other purposes.
Setting up an ADS-B base station is now as easy as getting a Raspberry Pi, plugging in a receiver, and downloading and configuring a ready-to-use system image. My system is based on a 2GB Raspberry Pi 4 in a heat sink, with a Flightaware ADS-B radio stick, a 1090MHz desktop antenna and a copy of Distribution of Flightaware’s Pliware software.
Based on Raspbian, Piaware is a silent distribution of Linux with all the software you need to work with a radio stick, including Dump1090 ADS-B Mode S decoder. The Dump1090 comes with a built-in web application that maps currently tracked aircraft and can also be used to send data to other applications and servers, helping to deliver data to larger public ADS-B networks.
You can get it kits that include all the necessary parts set up and launch an ADS-B receiver from amateur electronics stores for around £ 100 (including the Raspberry Pi). The main antenna that comes with these kits is good to start with, especially if you have a way to take it outside. You’ll probably want to invest in a larger antenna for better reception with more range, so make sure your budget is ready for an extra £ 30 to £ 60, depending on the length of the antenna.
Configuring a receiver is easy enough. You will need your GPS location up to 4 decimal places, as well as the approximate height of your antenna. You will also need to configure network connections, or WiFi, or wired Ethernet. Most of this can be done by editing the configuration files on Piaware’s microSD card, which allows you to treat the entire system as a device. With the available configuration data, you can start your server and let it run. I also configured mine to use SSH so I can log in from my desktop to update Raspbian and the Piaware stack as needed.
ADS-B is not the only way to track aircraft. Not all aircraft, especially military aircraft, transmit their flight data. However, most that do not have at least have transponders that emit an identifier and altitude at known frequencies. If you have enough receivers in known positions and enough computing power, you can use basic physics to determine where the plane is. This approach is known as versatility or, as it is better known, MLAT.
If you have set up a receiver, it is easy enough to join one or more networks to share the signals you receive and help build a live map of aircraft around the world, providing both ADS-B data and raw information for a transponder that can generate MLAT data. In exchange for your data, you will get access to the subscription services of the networks, which give better and more detailed results than the free commercial services – and of course, without any advertising.
LOOK: Raspberry Pi: Computer vision applications are now gaining momentum with the Khronos OpenVX API
I initially joined two networks, one of the larger public services with nearly 20,000 base stations worldwide and the other private with a focus on identifying unusual and military aircraft in the UK, and I live near the Thames, close to a large helicopter with low altitude through London and the city’s heliport, where most of the traffic is tracked only by MLAT, as well as on the west route in London Heathrow.
My antenna is currently taped to the rear bedroom window sill, with a Raspberry Pi and a window receiver next to the window, using WiFi to connect to the rest of my network and to the wider world of ADS-B data. You can see planes off the coast of Norfolk, as well as tracked military planes that use closed training airports, as well as regular RAF and army helicopter traffic up and down the river and even the joint fly of the French and British showing teams. It was an interesting project that looks like it will continue to pay off in the coming months and years, especially when I install this larger antenna.